![kb_logo.svg]](https://www.talentdesk.io/hubfs/kb_logo.svg)
Note: This feature isn't available for organizations using Single Sign-On (SSO). If you'd like to enable it, reach out to your Customer Success Manager.
Adding a new provider:
If your role has the Can manually create providers permission, you can add a provider directly:
1. Go to Team > Providers and click the dropdown next to Invite providers, then select Create provider.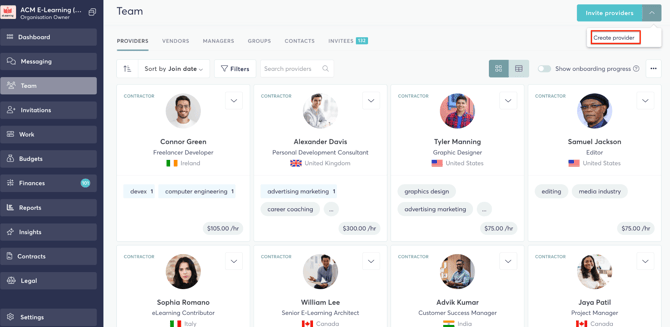
-
- Email address — the address the provider will use to log in once they claim their account. This can't already belong to a user in your organization or an existing TalentDesk account. If they already have a TalentDesk account, invite them as a provider instead.
- First name
- Last name
- Employment type — either Contractor or Employee (defaults to Contractor)
3. Click Create provider.
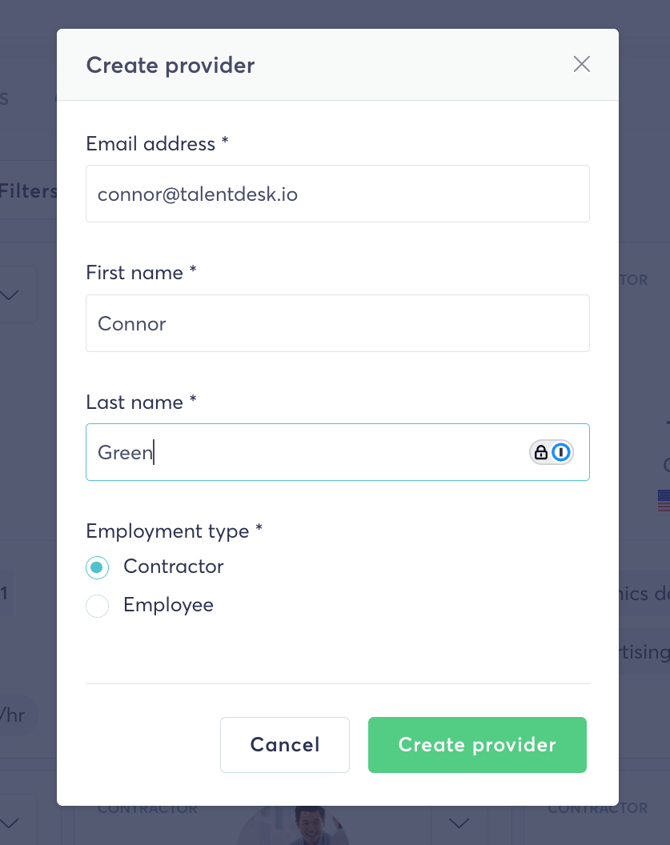
The provider is added to your organization immediately as an unclaimed provider. They'll appear in Team > Providers straight away and can be added to projects and tasks like any other provider — but no email is sent, and they can't log in until you invite them to claim their account.
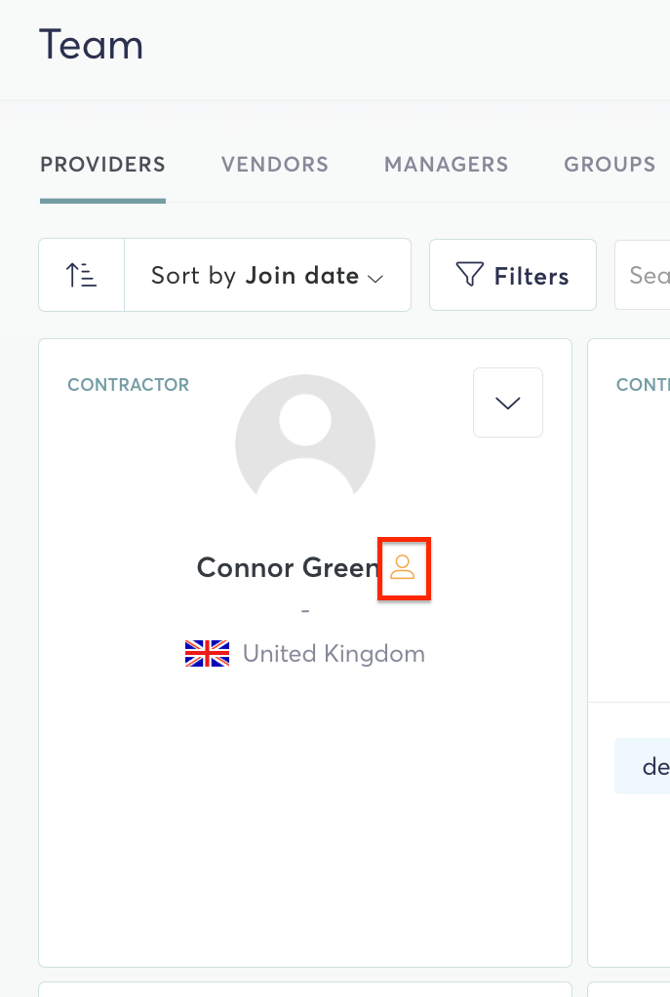
Spotting an unclaimed provider:
Unclaimed providers are marked with a small yellow icon next to their name, both in the Team list and on their profile page.
Until a provider claims their account, you can maintain their details on their behalf from two places:
- Team > Providers, in the provider's dropdown — Edit profile, Edit invoicing setting, and Edit payment methods
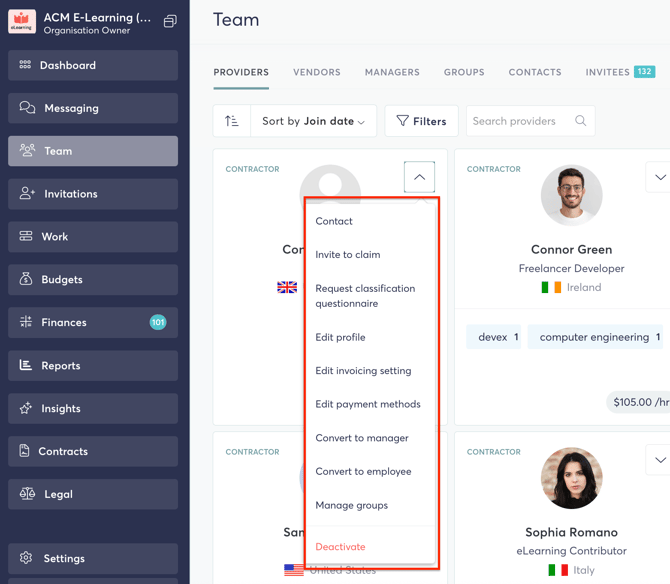
- The provider's own profile page, via the Edit profile dropdown
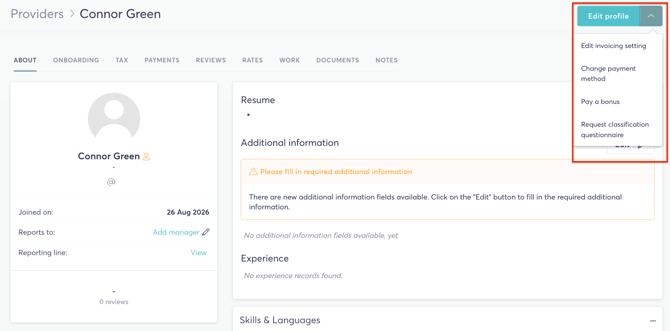
Profile — set their photo, name, pronouns, job title, date of birth, phone number, address, résumé, and attachments, using the same form the provider would fill in themselves.
Invoice settings — configure the details that will appear on their invoices:
- Payment terms — the number of days shown in the terms section
- Invoice number and payment reference — set a custom invoice number and view their payment reference
- Additional billing details — free text added to their invoices
Payment methods — set up how the provider will be paid, using whichever payout methods are enabled for your organization.
Note: Payoneer can't be set up on a provider's behalf. Payoneer accounts require the provider to complete registration directly, so this option stays disabled until they claim their account and add it themselves.
Inviting a provider to claim their account:
When you're ready to hand the account over, invite the provider to claim it:
1. Go to Team > Providers, open the provider's dropdown, and select Invite to claim.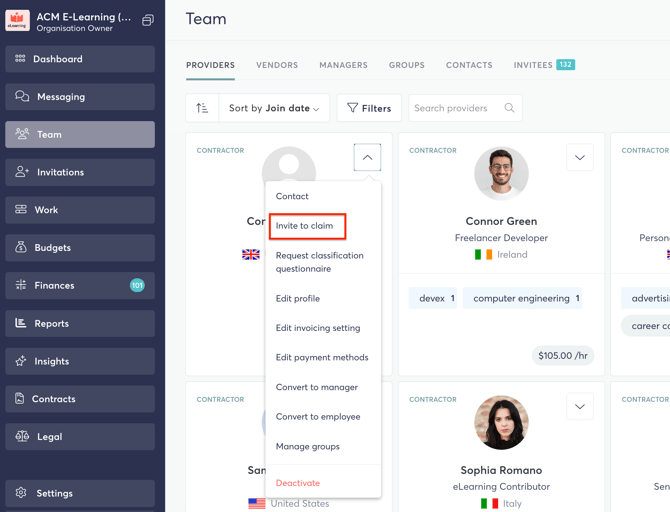
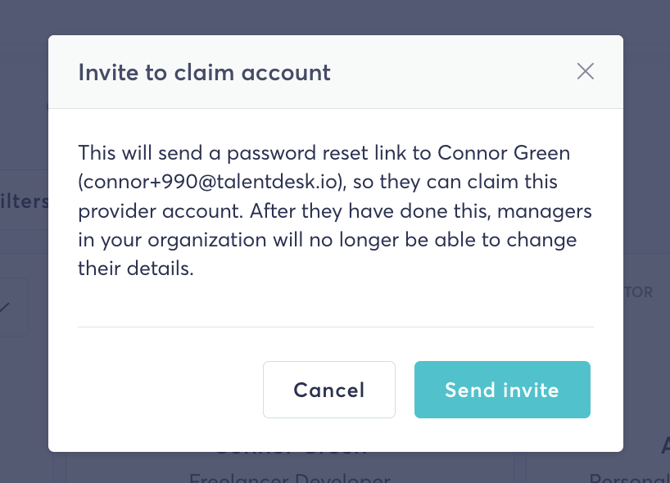
2. Confirm the invite. This sends a password reset link to the provider so they can claim their account — once they do, you'll no longer be able to edit their details on their behalf.
The provider receives an email with a Set password button. Clicking it takes them to a password reset screen where they choose their login password.
Note: Sending a new invite cancels any earlier one. If a provider has been invited more than once, only the most recent email link will work.
What happens when a provider claims their accountOnce the provider sets their password, their account is claimed, and they can log in. This also:
- Verifies their email address, if it wasn't already verified
- Sends them a confirmation email letting them know their password has changed
- Logs them out of any existing sessions, so they sign back in with the new password
From this point, they're an ordinary provider in your organization:
- The yellow "Manually created provider" icon no longer appears next to their name
- Invite to claim is no longer available in their dropdown
- You can no longer edit their profile, invoicing settings, or payment methods — the provider manages these themselves from their own account
Have a question we haven't covered? Reach out to your Customer Success Manager or the TalentDesk Support Team at support@talentdesk.io.
Thank you,
Team TalentDesk