![kb_logo.svg]](https://www.talentdesk.io/hubfs/kb_logo.svg)
This article walks through creating a request, both processes in full, and how to track everything along the way.
Creating a Position Request
If your role has the Can manage position requests permission, you can raise a request in a few steps:
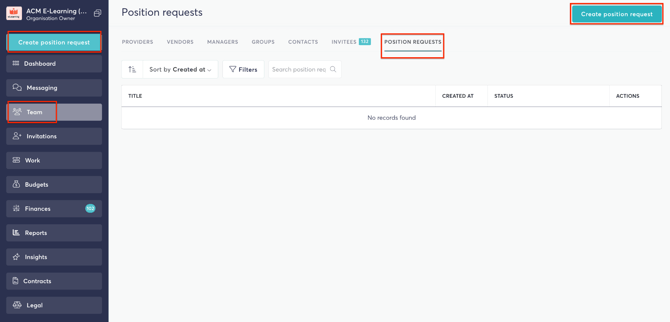
1. Go to Team > Position Requests and click Create position request.
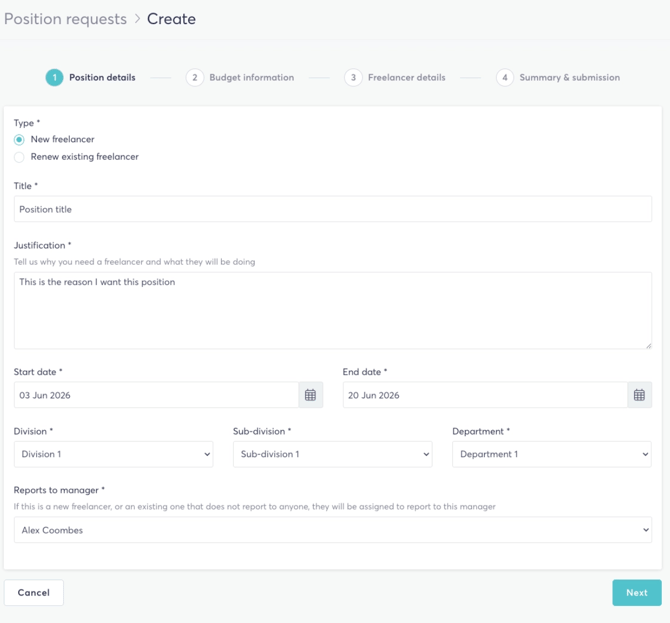
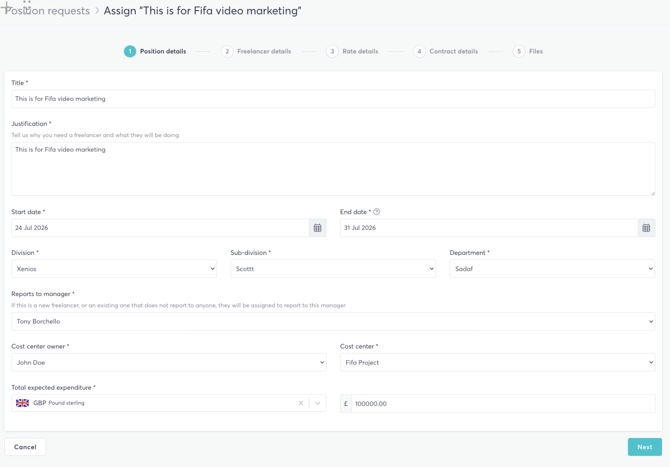
2. Position details — enter a title, a short justification for the position, the start and end dates, and select the Division, Sub-division, and Department it sits under. Choose who the freelancer will report to.
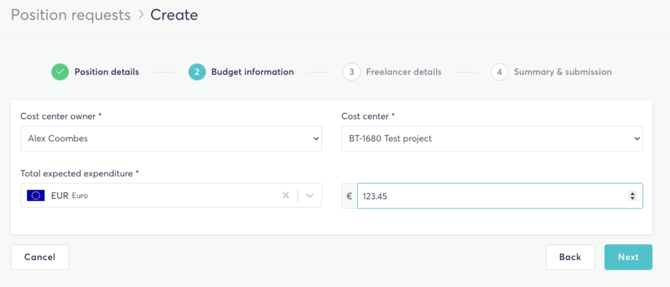
3. Budget information — select the cost centre owner, the project (cost centre), and the total expected expenditure.
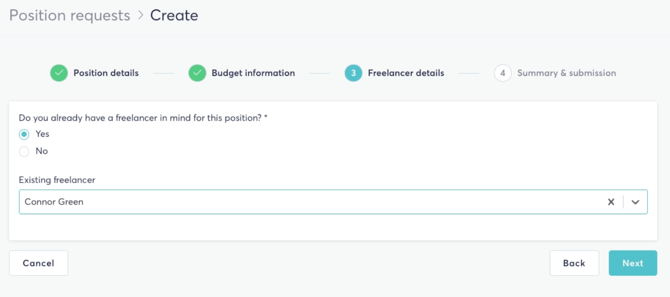
4. Freelancer details — if you already have someone in mind, search for their existing profile. If not, enter their name, email, and nationality details manually.
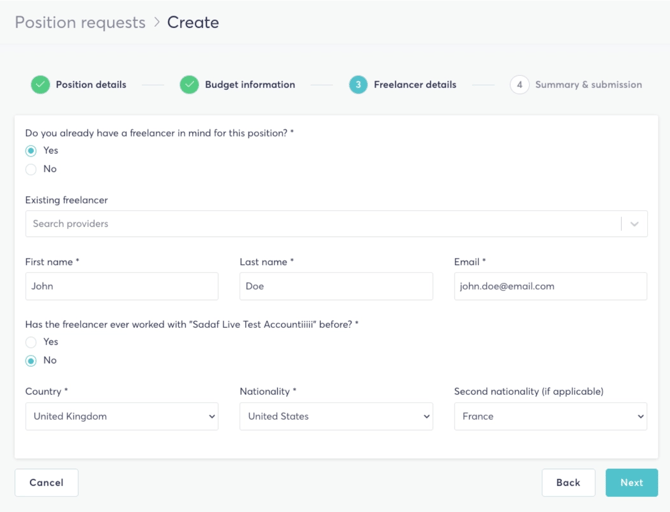
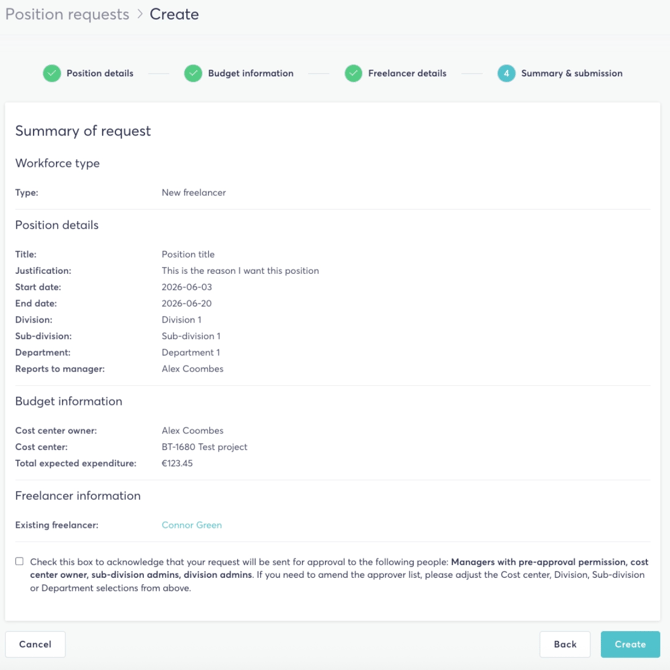
5. Summary & submission — review everything, confirm you understand who will be reviewing the request, and click Create.
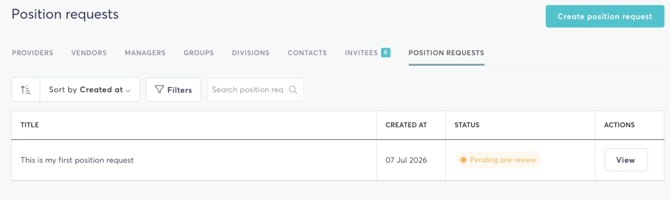
Once submitted, you'll be able to track its progress at any time from the Position Requests list.
Approval process (Stages 1–5)
Every Position Request passes through five review stages, in order:
Stage 1 — Created by the manager You submit the request as described above. It's now waiting on its first reviewer.
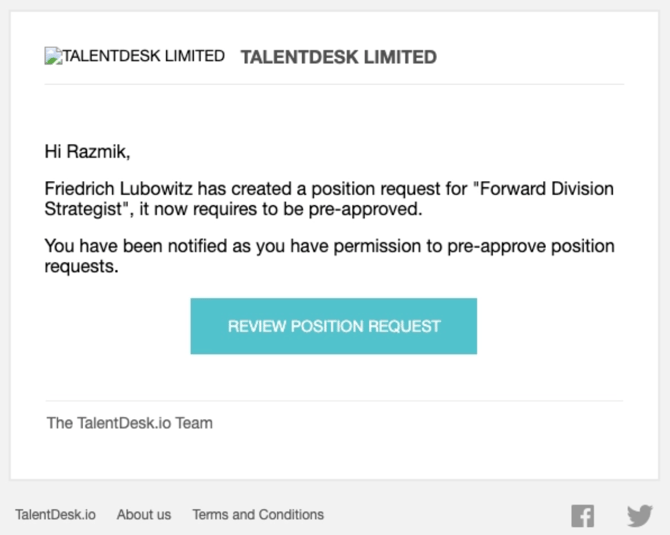
Stage 2 — Pre-review A manager with the Can pre-review position requests permission (which includes anyone with the Owner system role) checks the request before it goes any further.
Stage 3 — Project (cost centre) owner review The owner of the project (called a cost centre by some organizations) selected in the request reviews it next.
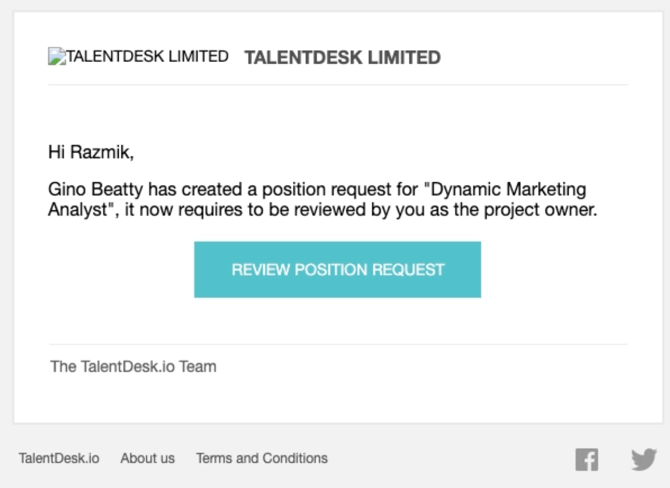
Stage 4 — Sub-division admin review Any admin of the sub-division selected in the request can review it — as can an admin of its parent division.
Stage 5 — Division admin review An admin of the division selected in the request gives the final approval on this side of the process.
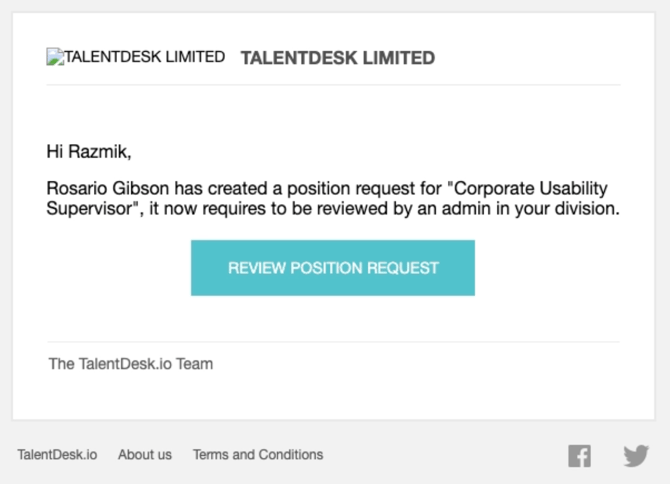
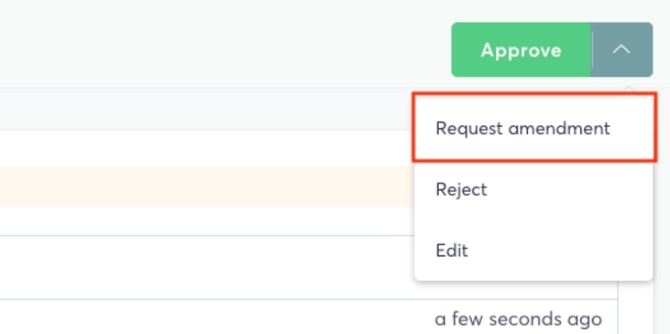
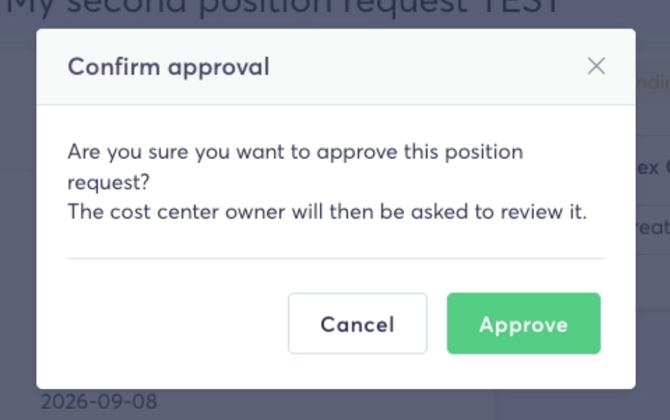
At each of these stages, the reviewer can:
- Approve — the request moves to the next stage.
- Reject — the request is closed and you're sent the reason.
- Request an amendment — you'll be asked to update the request; once you resubmit it, it goes back through all five approval stages from the start.
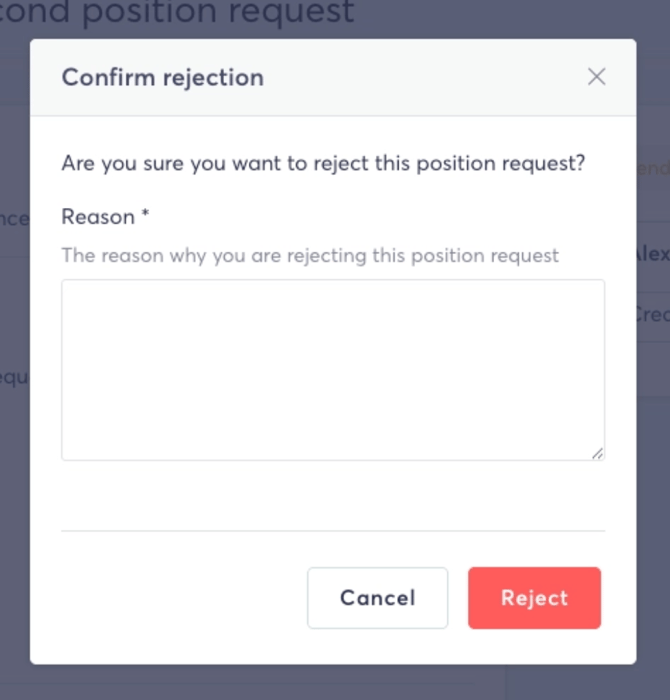
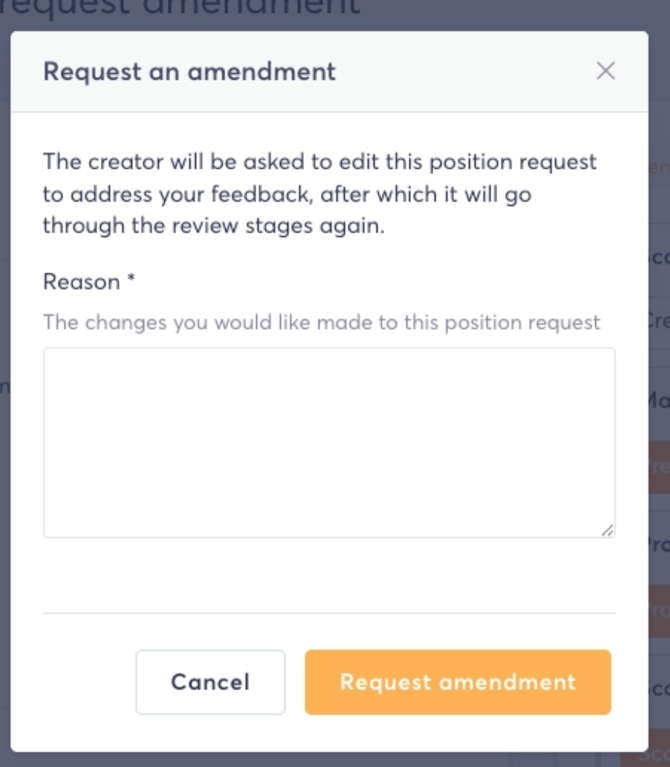
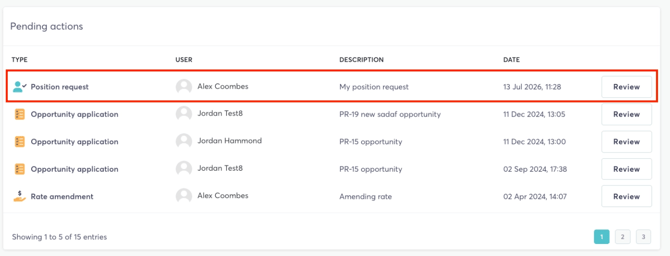
You'll get an email at every stage, and any request waiting on you also shows up under Pending actions on your dashboard.
Assigning a Position Request
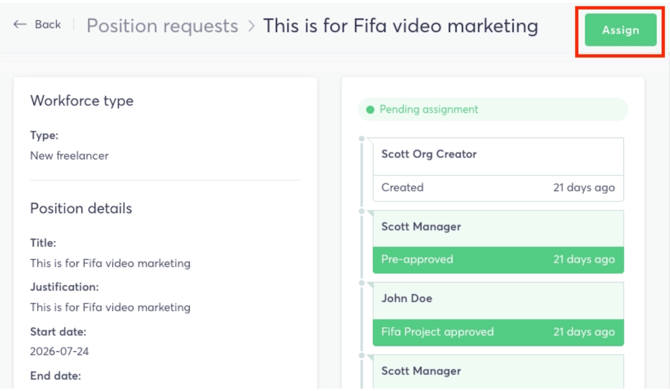
Once a request clears Stage 5, it's fully approved and ready to move into the assignment process, and can be assigned by any manager with the Can manage position requests permission by clicking Assign on the request.
Before you assign: setting up the Swiss contract template
Assigning a position uses a dedicated contract template for freelancers based in Switzerland. Before your organization can assign requests involving Swiss freelancers, an admin needs to select this template under Settings > Position requests.
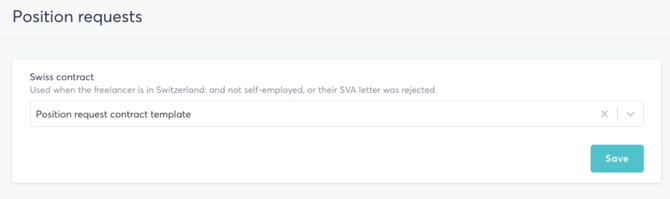
This template is used whenever the freelancer's country is Switzerland and either:
- they are not self-employed, or
- their SVA letter has been rejected (see Stage 2b below).
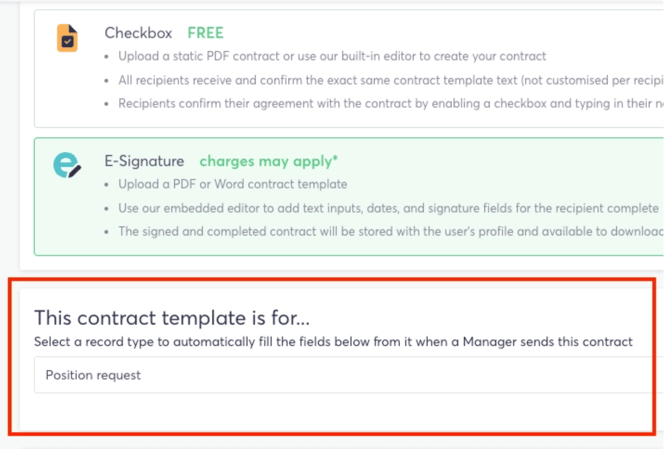
Only contract templates (created and stored within Contracts > Templates) that have been set up with "This contract template is for..." = Position request can be selected here — this is what lets the template auto-fill fields like budget amount, cost centre, division, and dates directly from the position request's details.
Assignment process (Stages 1–9)
Assigning a Position Request has its own 9-stage flow, separate from the approval process above.
Stage 1: Confirming details
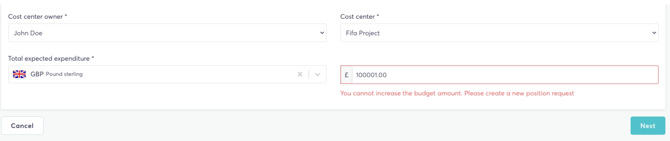
The position details are pre-filled from the original request. You can review and adjust them here, with one restriction: the total expected expenditure cannot be increased. If a larger budget is needed, a new Position Request should be created instead.
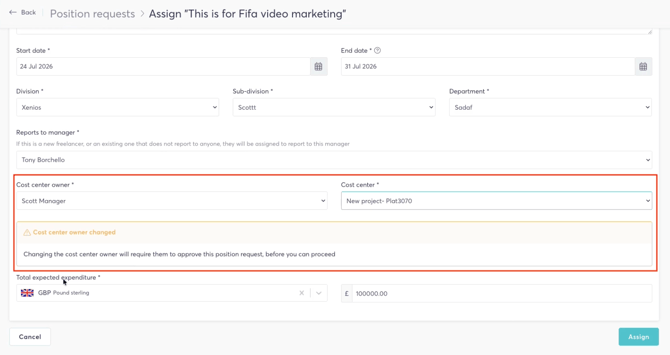
Stage 1a — Changed cost centre (project) owner review If you change the cost centre (project) during this step, you'll be warned that the new owner will need to review it before you can proceed.
When you submit:
- The new cost centre owner is notified.
- They can Approve (assignment continues to Stage 2), Reject (a reason is required; this is terminal — the position request is stopped and nothing more can be done with it), or Request an amendment (a reason is required; managers with the Can manage position requests permission can assign it again, and the new cost owner will review it again).
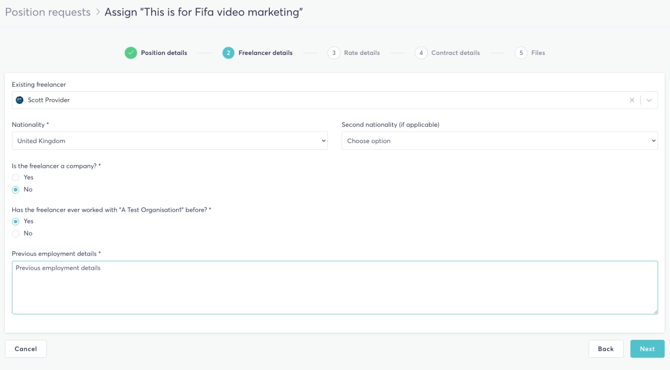
Stage 2: Freelancer details
These are pre-filled if freelancer details were provided when the request was created — they're optional at that stage, so you may be entering them here for the first time.
Stage 2a — Sanctioned countries If the freelancer's country, or either of their nationalities, is one of the following, you'll see a warning:
Belarus · Cuba · Iran · North Korea · Russia · Syria · Ukraine · Venezuela
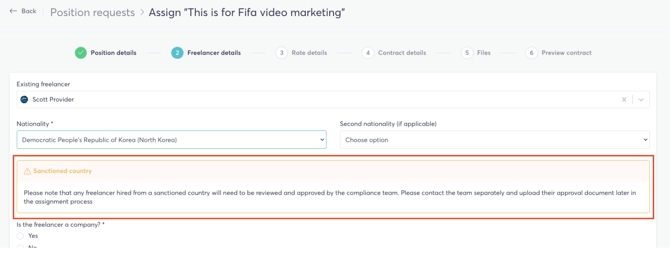
You'll need to contact the compliance team separately, and at least one supporting file will be required later at Stage 5 (Files).
Stage 2b — Swiss SVA file review If the freelancer's country (not nationality) is Switzerland, you'll be asked: "Is the freelancer a self-employed individual?" (If you selected an existing freelancer, this is based on their profile address country.)
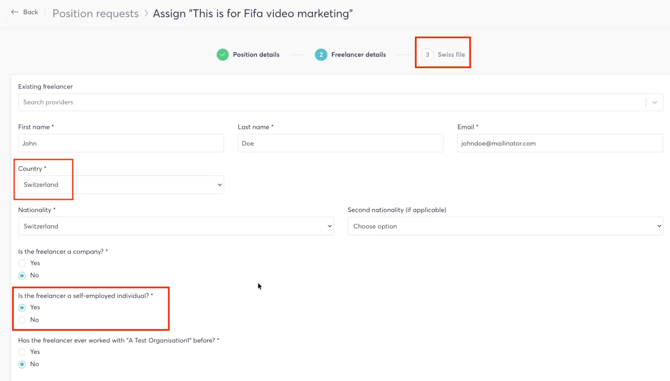
If you select Yes, you'll need to upload a Swiss SVA letter.
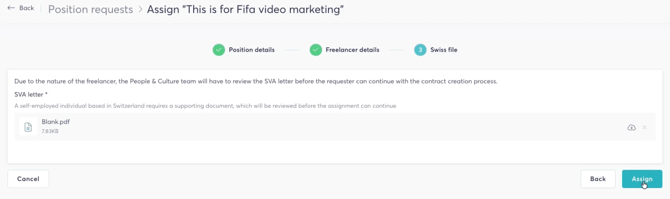
Submitting this notifies managers with the Can review position request Swiss file permission. The SVA letter is also visible for download from the request's Assignment tab.
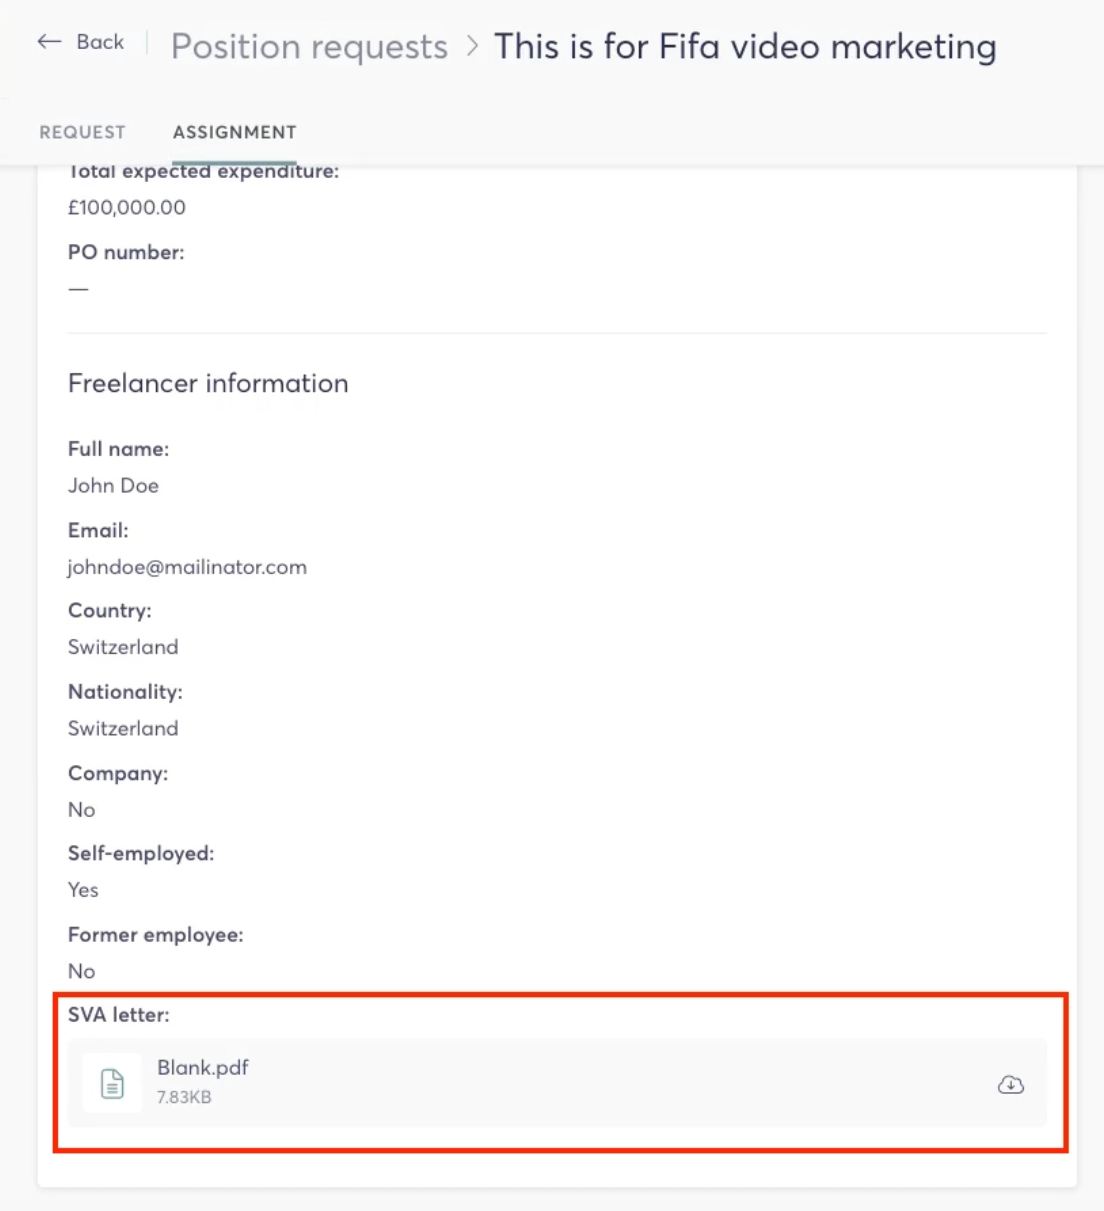
They can:
- Approve — notifies you, and the assignment continues to Stage 3.
- Reject — a reason is required, and you're notified. Unlike the other review stages, this is not terminal: a rejected SVA letter simply forces the organization's Swiss contract template (see above) to be used when provisioning later, and the assignment continues to Stage 3.
- Request an amendment — a reason is required, and you're notified. Managers with the Can manage position requests permission can assign it again, and managers with the Can review position request Swiss file permission will review it again.
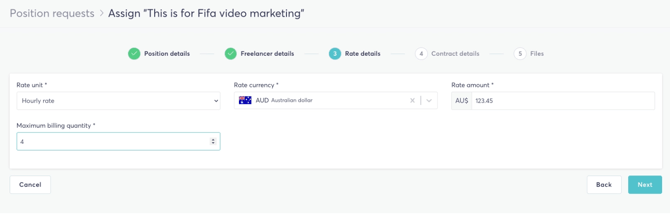
Stage 3: Rate details
Enter the rate unit, currency, amount, and maximum billing quantity for the assignment. These are used later during provisioning (Stage 8).
Stage 4: Contract details
These details are used for the contract the freelancer will be asked to sign once provisioning is complete: contract start and end dates, invoice submission timeframe, and first and second countersigners.
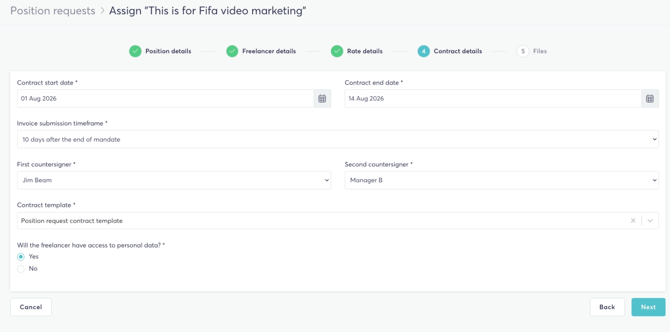
You'll also need to select a contract template — unless the freelancer's situation forces the Swiss contract template automatically, which happens if the freelancer is in Switzerland and either they are not self-employed, or they are self-employed and their SVA letter was approved. In every other case (including if they're simply not in Switzerland), you choose the template yourself.
You'll also confirm whether the freelancer will have access to personal data as part of this role.
Stage 5: Files
Add any files relevant to the assignment for the final review stage.
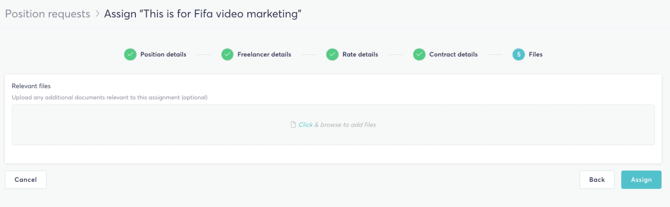
If the freelancer is connected to a sanctioned country (Stage 2a), at least one file is required here.
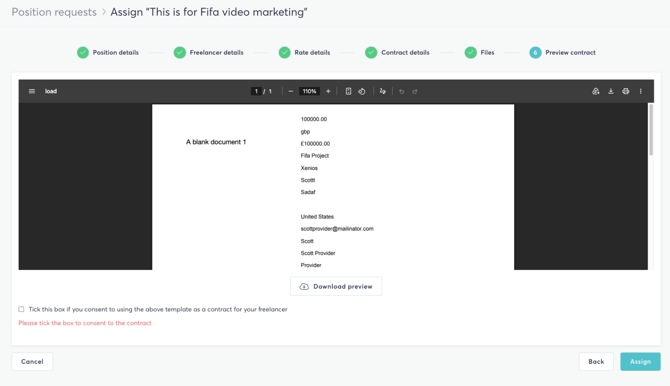
Stage 6: Contract preview
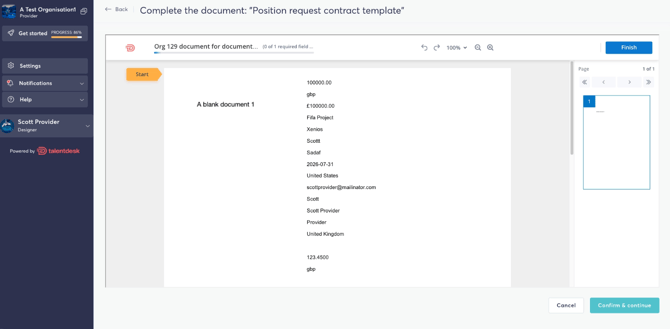
TalentDesk generates and displays a preview of the contract the freelancer will be expected to sign. You'll need to tick a checkbox confirming you consent to using this template before you can finish the assignment.
Stage 7: Assignment review
Managers with the Can review position request assignments permission are notified to review the completed assignment. They can:
- Approve — notifies you, and starts provisioning (Stage 8).
- Reject — a reason is required, and you're notified. This is terminal: the position request is stopped and nothing more can be done with it.
- Request an amendment — a reason is required, and you're notified. Managers with the Can manage position requests permission can assign it again, and it goes through the full assignment review stages again.
Stage 8: Provisioning
Once the assignment is approved, provisioning happens automatically.
For an existing freelancer:
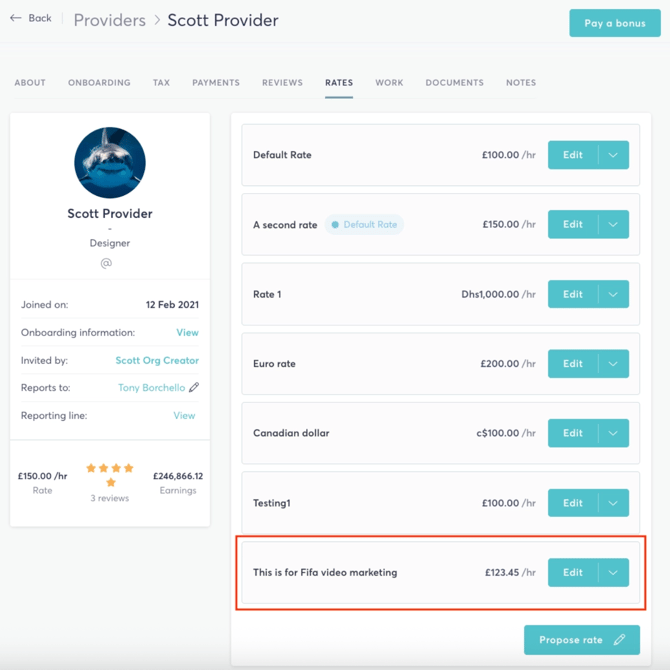
1. A rate is created for the provider using the rate details from Stage 3 (unless they already have a matching rate).
2. A task is created, titled the same as the position request.
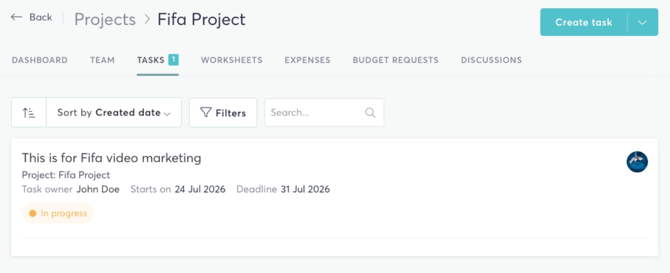
3. The provider is assigned to the task with that rate.
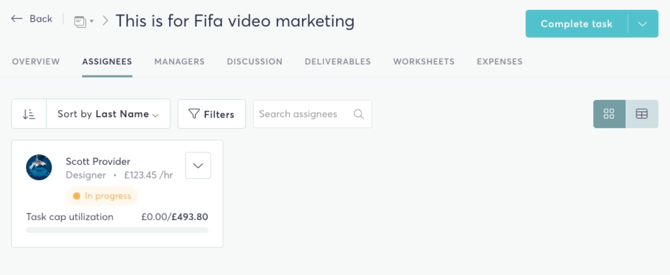
4. If the provider doesn't already report to a manager, they're set to report to the manager selected during assignment.
5. The provider is required to sign the contract, based on the details from Stage 4 and Stage 6.
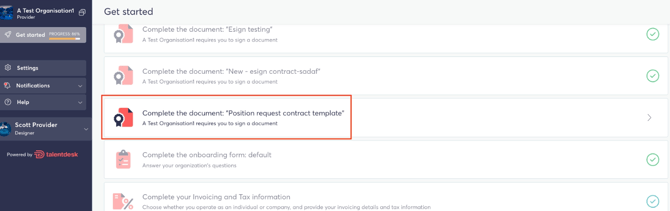
For a new freelancer:
- The freelancer is emailed an organization invitation.
- Once they accept, the same provisioning steps as above take place.
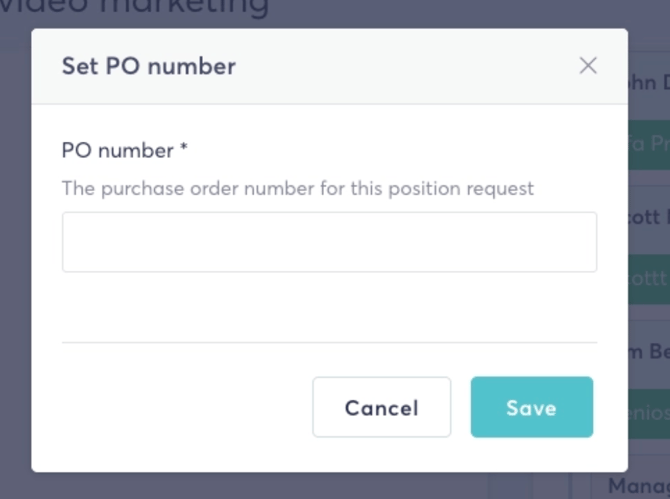
Stage 9: Setting the PO number
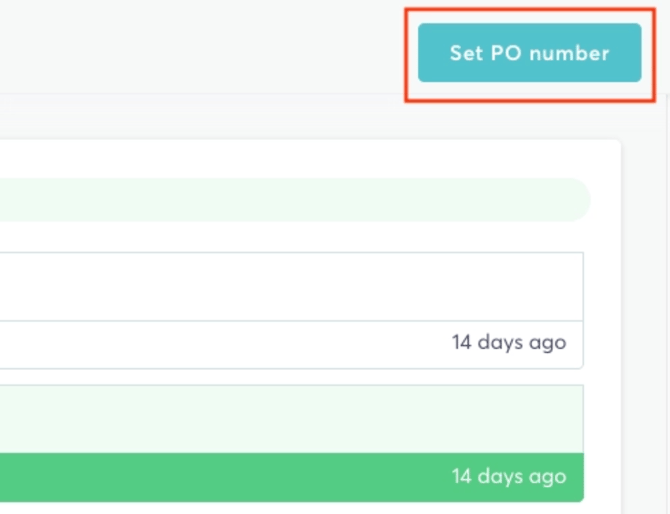
Once a position request has been assigned and provisioned, managers with the Can set position request PO numbers permission can set its PO number — an internal reference used in your organization's own systems.
Tracking a request
From Team > Position Requests, you can view, filter, and search all requests by title or status.
Opening an individual request shows its full details, an Assignment tab with the assignment-specific information (like the SVA letter, if applicable), and a status history timeline showing exactly who reviewed the request at each stage, what action they took, and when.
Renewal reminders
Seven days before a Position Request's assignment end date, the manager who created it receives an email reminder that it's ending — a useful nudge to raise a renewal request if the work is continuing.
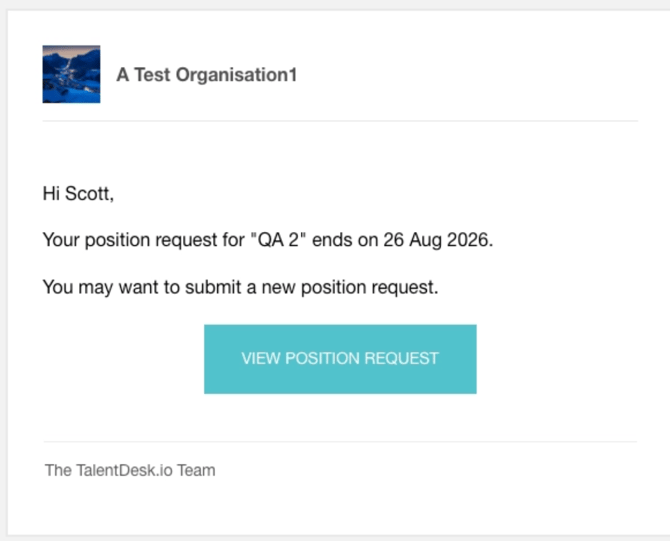
This reminder can be customised by your organization's admins under Settings > Email Templates.
Bulk importing Position requests
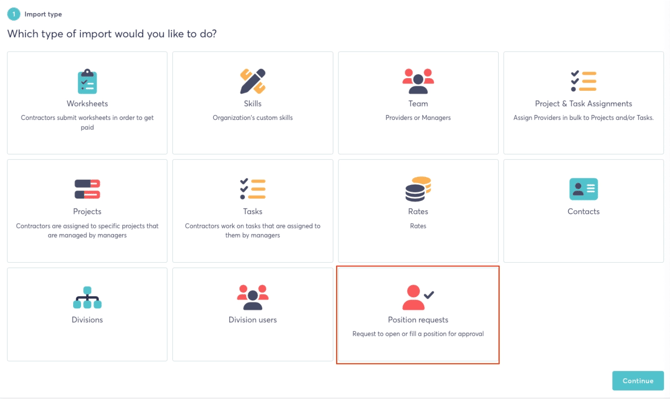
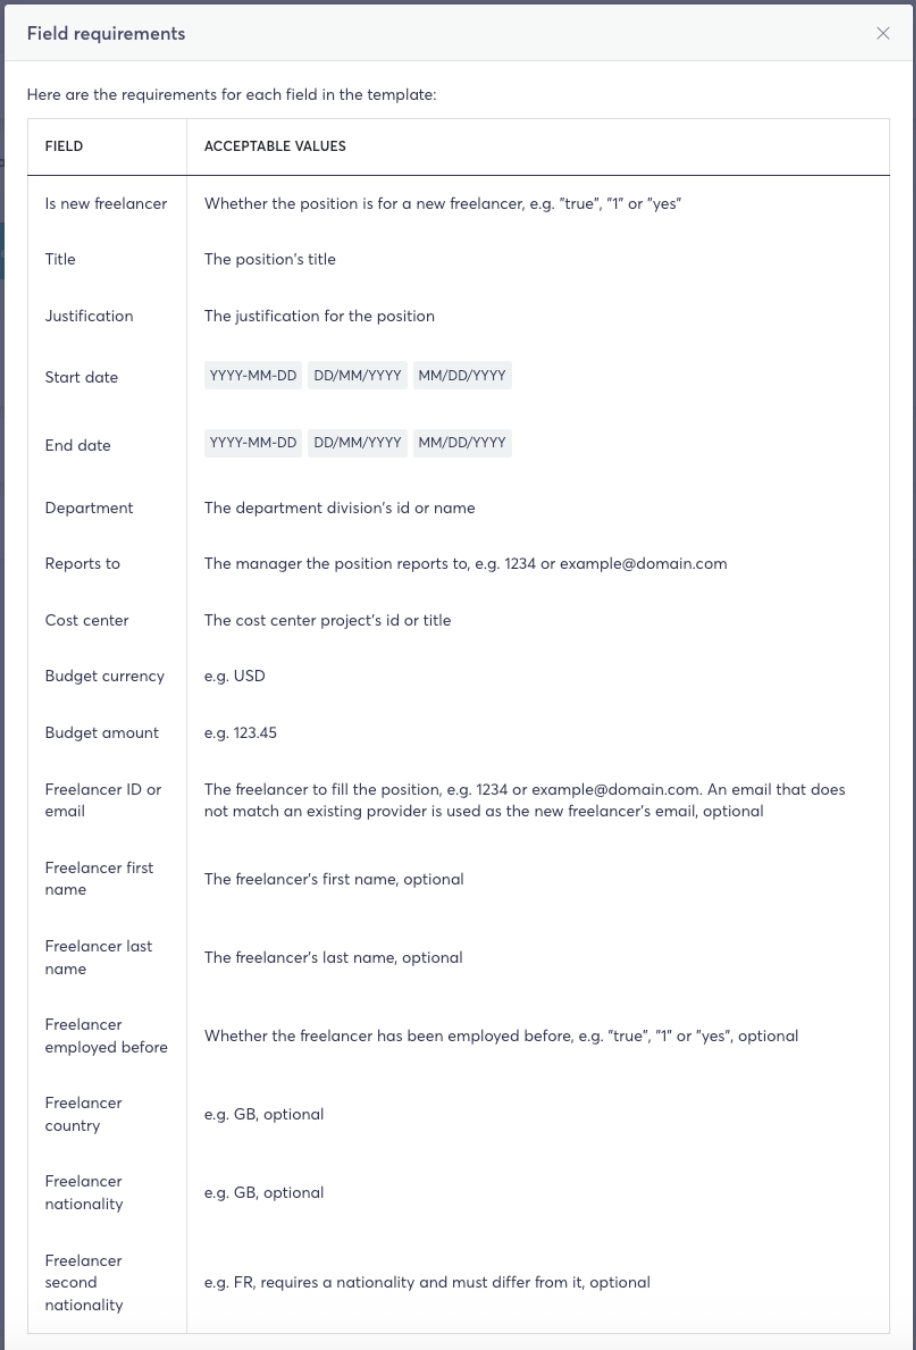
Position requests can also be created through our bulk importer, for the organizations that have position requests enabled, by the users who can manage them. Go to Settings>Imports and follow the easy steps.
Have a question we haven't covered? Reach out to your Customer Success Manager or the TalentDesk Support Team at support@talentdesk.io.
Thanks,
Team TalentDesk!